Potatoes are delicious in any form — fried, baked, mashed, you name it! We love consuming these tasty tubers year-round. So, why not cut the cost and plant them ourselves? In fact, anyone can plant their own potatoes at home, even if they think they don’t have enough space. All you need to start is some soil and a fabric bag!
Growing potatoes in grow bags is becoming a hobby for many home gardeners, and why not? If they can get the same delicious flavor with less space and money, who would say no to that?
Here, you’ll learn every step for growing these starchy tubers in a grow bag. So, let’s get started!
- In a Hurry? Here Are Our Top Picks…
- Why Grow Potatoes in Grow Bags?
- Disadvantages of Growing Potatoes in Grow Bags
- How to Pick the Right Size Potato Grow Bag
- Choose High-Quality Compost
- Is Fertilizer A Must When Growing Potatoes?
- Best Time to Grow Potatoes
- When will My Potatoes be Ready to Harvest?
- What is a Seed Potato?
- Our Recommended Seed Potatoes
- Making Seed Potatoes Sprout
- The Best Site for Potatoes to Grow
- Planting Seed Potatoes
- Watering
- Get Rid of Pests
- Potato Disorders, Causes, and Remedies
- Harvesting
- FAQs about Grow Bags for Potatoes
- Bag Aftercare
In a Hurry? Here Are Our Top Picks…
| Image | Title | Prime | Buy |
|---|---|---|---|
 | Cavisoo 5-Pack 10 Gallon Potato Grow Bags | PrimeEligible | Check Price on Amazon |
Top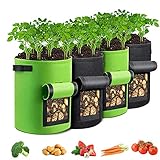 | GORDITA Grow Bags- 4 Pack Potato Grow Bags with Flap- 10 Gallon Potato Planter Bags | PrimeEligible | Check Price on Amazon |
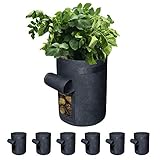 | Gardzen 6 Pack BPA-Free 10 Gallon Vegetable Grow Bags with Access Flap and Handles | PrimeEligible | Check Price on Amazon |
 | Potato Grow Bags with Flap 10 Gallon, 4 Pack Planter Pot with Handles and Harvest Window | PrimeEligible | Check Price on Amazon |
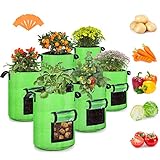 | 10 Gallon Potato Grow Bags, 6 Pack, Two-Sides Window Garden Planting Bag | PrimeEligible | Check Price on Amazon |
Why Grow Potatoes in Grow Bags?
There are so many benefits to growing potatoes in bags – here are a couple of them:
Better Control of Temperature
Grow bags provide and maintain the ideal temperature for potatoes to grow and flourish so they don’t get overly dried out or waterlogged.
Better Air Exchange
Since fabric grow bags are breathable, they ensure that your potatoes are getting a healthy amount of airflow while growing.
Portability
You can move your potatoes in grow bags quickly and easily – there’s no need to worry about picking the right spot for them to grow, as you can always move them to a better spot. How cool is that!
Accessibility
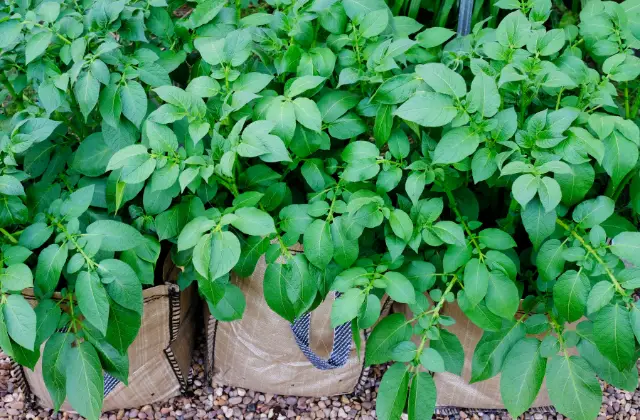
A lot of potato grow bags have openings that enable you to easily access your potatoes and monitor them. You can check their growth, so you know when they’re ready for harvesting without having to dig very deep.
They are Reusable
Reusability is a big plus when it comes to growing potatoes in bags. They can be used more than once, possibly for multiple seasons.
You Can Grow Other Vegetables in Potato Grow Bags
There are grow bags designed specifically for potatoes, but potatoes aren’t the only thing you can grow in these bags. You can also grow other delicious vegetables like carrots, cucumbers, tomatoes, and sweet potatoes!
Disadvantages of Growing Potatoes in Grow Bags
Now that we’ve talked about what’s good about growing potatoes in grow bags, there are also some things to keep in mind that might make the experience less enjoyable if ignored.
They Need More Watering
The most difficult thing about growing potatoes in a bag is that it requires more watering than if you’re using a traditional in-ground method of growing. They also need more watering than they would in containers or pots.
The reason behind this is that grow bags allow excess water to freely drain from the bag – ideal because you never have to worry about over-watering your plants. So, expect the potatoes in the bag to take more time and effort to grow.
Not Super Durable
Though you can use them for 3 or 4 seasons (depending on cleaning and storage), grow bags aren’t as durable as a pot or container, which can last almost forever. So, be aware of the potential long-term cost implication of this.
Tip: One of the advantages of growing potatoes in grow bags is we are limiting soil-born diseases that potatoes can get by having them above the ground. Be aware that if you set the bag directly on the ground it nullifies that advantage and you can still get diseases that move right up into the bag. It is important to set your grow bags on blocks to create a separation between the bag and the ground.
How to Pick the Right Size Potato Grow Bag
Because grow bags don’t come in standard sizes (for example one brand of 10-gallon bag may be wide and squat while another is narrow and tall), it is best to decide based upon the bag dimensions. Look for a grow bag that has a depth of at least 16 inches. For a grow bag with a diameter of 24 inches you can fit 3 or 4 potato plants. Generally you will find these dimensions with 20 to 30-gallon bags.
Choose High-Quality Compost
The quality of your potatoes depends on the nutrients they take from the compost or soil you plant them in. To plant potatoes, good-quality multi-purpose compost is crucial. Potatoes thrive in soil that has good drainage, is rich in organic material, and has a pH between 6.0 and 6.5, according to the University of Maryland.
Is Fertilizer A Must When Growing Potatoes?
For maximum yields and quality, potato plants need 17 mineral elements (nitrogen, phosphorus, sulfur, calcium, magnesium, potassium, iron, manganese, molybdenum, copper, boron, zinc, chlorine, sodium, cobalt, vanadium, and silicon); however, most of these are only needed in small amounts and are usually already present in the soil, according to Oregon State University.
Therefore fertilizer isn’t a must if you have good-quality compost with slow-release nutrients. However, if you’re seeking the heaviest harvest of potatoes, especially if you’re reusing your compost, it’s recommended to add some potato fertilizer.
- NPK Composition: 6-3-9
- Great for sweet potatoes, bakers, boilers and reds
- Encourages all-around growth
- Includes spoon
- 3 Lbs. package
Best Time to Grow Potatoes
As a general rule, plant them in March and harvest them in the summer. You can, however, plant your potatoes in April or May and harvest them before fall. In fact, you can even plant them in August or September, and your crop will be ready in December.
How Many Potatoes Per Plant?
Just like many things in gardening and in life, the answer is that it depends! The number of potatoes a single seed will yield will depend on the size of the grow bag, the amount of soil and nutrients available, and the variety of potato being grown.
In general, a medium-sized grow bag (around 10 gallons in size) can yield up to 6-8 potatoes from a single seed. This number can increase with larger grow bags, and can also vary depending on the variety of potato. For example, a common variety like Russet potatoes may yield more potatoes than a fingerling variety.
It’s important to note that the size of potatoes grown in a fabric grow bag will usually be smaller than those grown in the ground due to the limited amounts of soil and nutrients.
When will My Potatoes be Ready to Harvest?
The readiness of your potato harvest mainly depends on two things – the potato variety you choose and the weather.
First, early potatoes should be ready to harvest around 10 weeks after you plant them, while second early potatoes should be ready to harvest around 13 weeks after planting them. Maincrop potatoes, on the other hand, are typically ready to harvest around 20 weeks after you plant them.
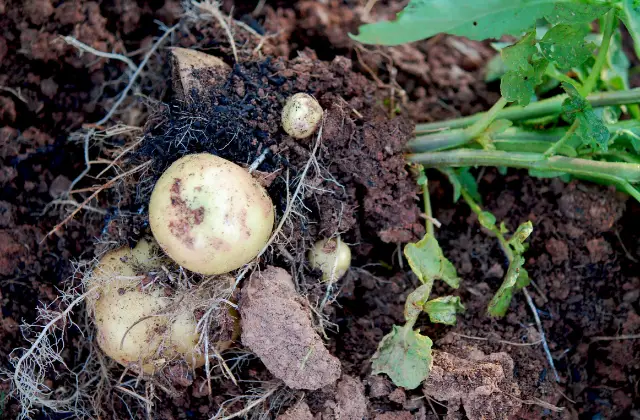
Choosing which variety to grow is really up to you. Just decide your preferred time to harvest your potatoes, and then you figure out what variety is the best to plant at that time. If you’d like to plant potatoes in April or May and harvest them in early June or July, we recommend you to go for a first early or second early potato variety, as they take less time to grow.
Once you’ve made up your mind about which type of potato you want to grow, it’s time to buy the seed potatoes.
What is a Seed Potato?
Seed potatoes are the ones that have been specifically grown to be replanted and produce potato crops. The plant will grow out of the shoots that sprout from the seed potatoes.
Buying seed potatoes is definitely a good idea because you can guarantee that your seeds are disease-free and certified.
Tip: When buying potatoes for a garden, it is best to buy certified seed each spring that has been inspected and is free from disease, as potatoes in the grocery store are typically treated with a sprout inhibitor, making them unable to grow, according to Colorado State University.
Our Recommended Seed Potatoes
| Image | Title | Prime | Buy |
|---|---|---|---|
 Top
Top | Yukon Gold Seed Potato - Best Early Eating Potato on The Market - Includes one 2-lb Bag - Can't Ship to States of ID, ME, MT, or NE | Prime | Check Price on Amazon |
 Top
Top | Red Pontiac Seed Potato - Everybody's Favorite Red Potato - Includes one 2-lb Bag - Can't Ship to States of ID, ME, MT, or NE | Prime | Check Price on Amazon |
Top Top
Top | Seed Potato Mix, 5 lbs. Certified Seed Non GMO Red Lasoda, Golden Yukons and Blue (5) | Prime | Check Price on Amazon |
 Top
Top | Simply Seed - Russet Burbanks - Naturally Grown Seed Potatoes - 5 LBS - Ready for Spring Planting | Prime | Check Price on Amazon |
 Top
Top | Organic US Grown Potato Medley Mix - 10 Seed Potatoes Mixed Colors Red, Purple and Yellow from Easy to Grow Bulbs | Prime | Check Price on Amazon |
 Top
Top | Simply Seed - 5 LB - Kennebec Potato Seed - Non GMO - Organic Grown | Prime | Check Price on Amazon |
 Top
Top | Simply Seed - 10 Piece - Fingerling Potato Seed Mix - Non GMO - Naturally Grown | Prime | Check Price on Amazon |
Making Seed Potatoes Sprout
When you let the seed potatoes sprout prior to planting, you’ll help your potatoes to grow faster, thus not only harvesting earlier but also getting a bigger yield. You should start this process 3-4 weeks before planting your potatoes in the grow bag.
To start, place your seed potatoes in front of a sunny window, and if you want to keep them from rolling all over, put them in an open egg carton. You should start seeing initial results after one week. The shoots should be quite short and look strong, with a pinkish green color.
If you notice the shoots look long, white, and fragile, this is an indicator your seed potatoes didn’t get enough light.
The Best Site for Potatoes to Grow
Firstly, as a rule, it’s always best to plant potatoes when there is no threat of frost. Secondly, find the sunniest spot possible, and pick that! The all-day sun is preferred, but 6-8 hours are also enough. Be mindful that you’re going to have to regularly water your potatoes, especially if there’s little to no rainfall.
One great perk of growing potatoes in a bag is that the bag is portable, so if you don’t get a perfect spot from the beginning, you can move it. It’s always better, though, to put them in the right place from the get-go to minimize any disruption and let them thrive as much as possible from day one.
- The only comprehensive resource for home gardeners and commercial potato growers, The Complete Book of Potatoes has everything a gardener or commercial potato grower needs to successfully grow the best, disease-resistant potatoes for North American gardens. Includes practical as well as technical information about the potato plant, its origin, conventional and organic production techniques, pest management, and storage practices. The plant profiles include still life photographs of the exterior and interior of the tuber, and a succinct description of each variety’s physical and culinary qualities.
Planting Seed Potatoes
If your seed potatoes are small enough, it’s okay to plant them whole, but larger ones should be cut into around five 2-ounce chunks – each about the size of a lime. A lot of other gardeners, I feel, are too timid with how many seeds they plant in a grow bag. In my experience, you don’t need to worry too much about crowding your seed potatoes. For example, you can easily fit 12-14 potato seed pieces in a 15-gallon grow bag. Cover them with several inches of soil and then water them.
Tip: Don’t mix varieties in the same grow bag as each will take a different time to mature and thus will need to be harvested at different times.
Place the grow bag where it can get a lot of sunshine and stay cool, and not in a hot spot like against a hot wall or on a concrete patio. Keep watering as needed to make the deep plant roots moist, not soggy or wet. Fold the bag down from its top, forming a 4-inch cuff. Then, add about 4 inches of moist soil into the bag.
Planting sprouted potatoes isn’t much different from planting unsprouted ones. You just need to be gentle with the seed potatoes so that you don’t damage the sprouts. Make sure to orient the roots down and the growth up from where the foliage is going to come from when you can. Also, make sure they have even space between each other and cover them with 3 inches of soil.
When the plants reach around 8 inches tall, that’s when you add some soil. Don’t worry about the leaves getting buried, that’s fine. As you add the soil, unfold the top of the bag, adding an extra 4 inches of water and soil. And once the plants grow 8 more inches, do the same again, and continue to repeat until the bag is completely full and you’re out of soil.
This technique will help your plants produce a lot of potatoes, which will come out of the parts of the stem which are buried under the soil.
Watering
Though the porous fabric gives the potato bag a space to breathe, which prevents overwatering and overheating, you want to monitor the level of moisture in the bag since it can also dry out quickly.
The soil shouldn’t feel soggy and should instead be moist. During the hottest time of the summer, you might want to water your potatoes every day! It all depends on how moist or dry your soil is.
Get Rid of Pests
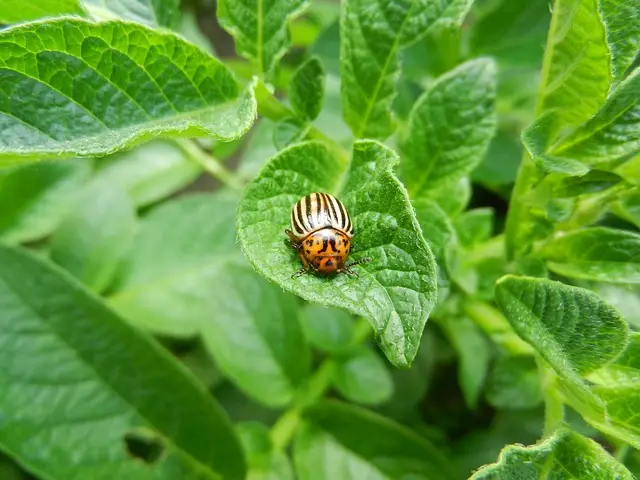
One of the most common pests is the Colorado potato beetle. Check your potato bag regularly, and make sure to look under the leaves for clusters of the beetle’s yellow eggs. If you find them on your plant, just rub them off using your finger or anything else.
It’s easy to identify and control adult beetles. You’ll need to pick them off with your hands and throw them into a container filled with water mixed with soap. The beetles might bother you for a few weeks, but with regular checking and hand-picking, your potatoes should be fine afterward.
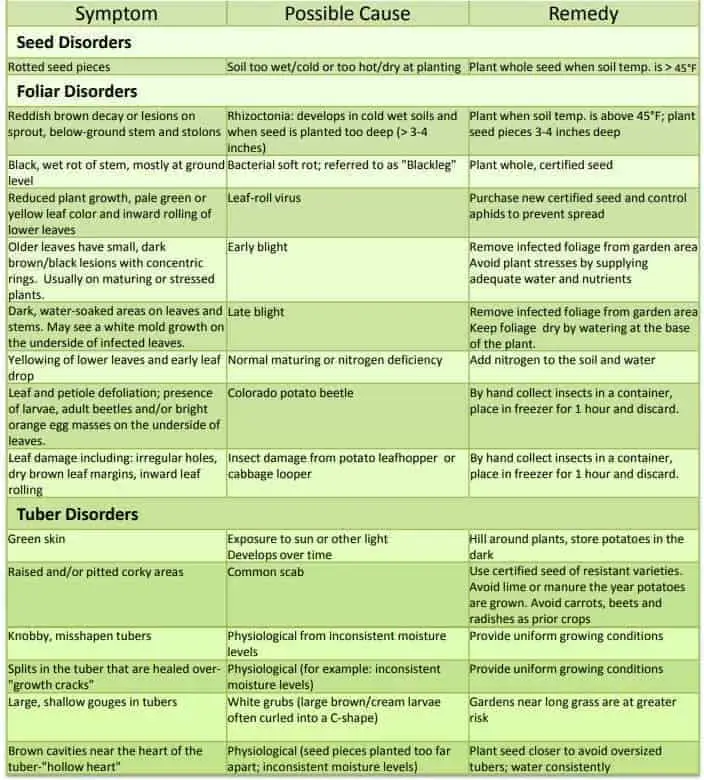
Potato Disorders, Causes, and Remedies
Harvesting
Watering is key if you want to see your potatoes growing vigorously in the summer. However, toward the end of the season, you’ll see that the leaves will begin yellowing a bit, and stems will start to wilt. This is when you should cut the watering and wait a week or two (assuming you planted them in spring). And there you go, your fresh potatoes should be ready to harvest!
Your potatoes will look quite shabby before harvesting time. You can harvest small potatoes by gently probing the soil using your fingers. But leave the bigger tubers and wait for them to mature. Cook the small potatoes as quickly as possible and store the larger ones in a cool, dry, shaded place indoors until you are ready to use them.
FAQs about Grow Bags for Potatoes
Generally speaking, you should aim to bury your potatoes at least 8 inches deep.
It really depends on what you’re looking for in terms of companion planting. Some popular plantings with potatoes are peas, beans, carrots, onions, and garlic. It’s important to keep in mind that some plants can interfere with the growth of potatoes, such as tomatoes, squash, and sunflowers. Experiment with different combinations to find out what works best for your garden!
To hill potatoes, you need to mound soil around the base of the plant. This will ensure the potatoes get enough moisture and are protected from pests, keep the soil temperature even, and help the potatoes to form larger tubers. To do this, use a hoe or shovel to create a mound around the plant that is about 6-8 inches high. Make sure to leave some of the stems and leaves exposed so the potatoes can continue to grow.
Growing potatoes in water is actually quite easy! Start by placing some potato pieces in a shallow dish of water, making sure the pieces are not touching each other. Change the water every few days and keep it in a warm, sunny spot. The potatoes should start to sprout in a few days. Once the sprouts are a few inches long, transfer them to a pot filled with soil.
Bag Aftercare
After harvesting, everything in the bag should be emptied (soil, plants, and everything else) into a wheelbarrow. Dig into the soil and pull the potatoes out. Expect to harvest on average 7 lbs of potatoes, although in a good year, you can harvest as much as 13 lbs.
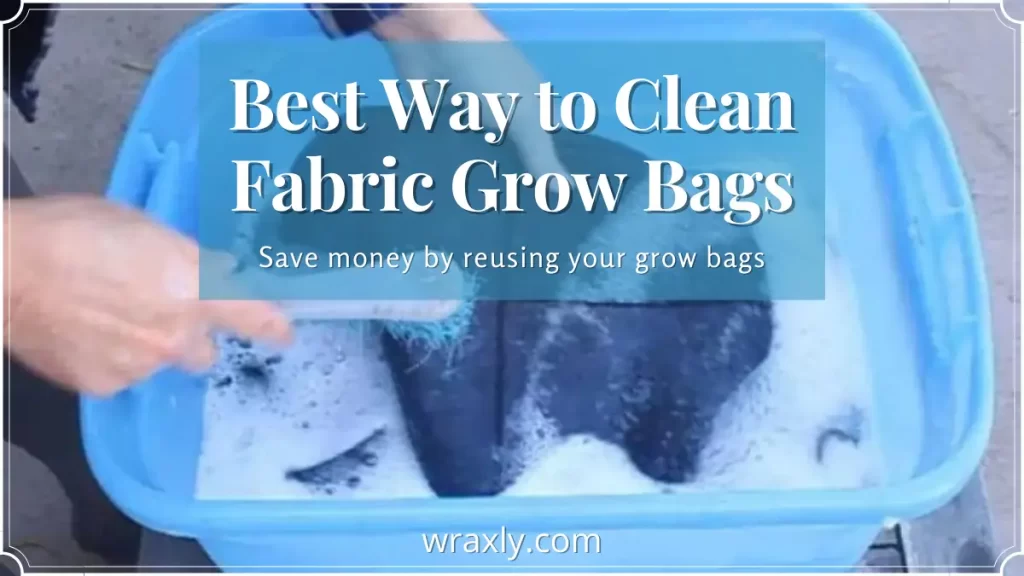
Then, either put the remaining soil in your compost pile or just add it to your garden. If your bag is still in good condition, clean it out and use it next season. Though growing potatoes might seem like a ton of work, once you get used to planting them, it will become almost second nature.
And the best part? You’ll get to enjoy these delicious, natural, home-grown potatoes with your family throughout the whole year!
Darrell has a passion for gardening that he inherited from his father. Go here to read more about the influence his father played in his love for gardening. If you want to send Darrell a quick message, then visit his contact page here.


![Container gardening for beginners [Buying guide]](https://wraxly.com/wp-content/uploads/2021/02/Container-gardening-for-beginners-Buying-guide-1200-1024x576.webp)