Are you ready to delve into an exhilarating outdoor project but need to treat untreated wood for outdoor use? Whether your imagination is set on crafting a sturdy deck, an enchanting garden fence, or a comfortable outdoor bench, the potential is boundless!
However, there’s one small hurdle to overcome – the wood you have is untreated.
But fear not! With the right knowledge and proper treatment, you can easily transform untreated wood into a durable and reliable material. So, the million-dollar question: “How to treat untreated wood for outdoor use?”
Well, fret no more, as we’ve got you covered! In this comprehensive guide, we’ll unveil all the tactics and secrets to treat wood for the great outdoors. Get ready to learn the step-by-step process and turn your untreated wood into a masterpiece for your outdoor haven!
Understanding Untreated Wood
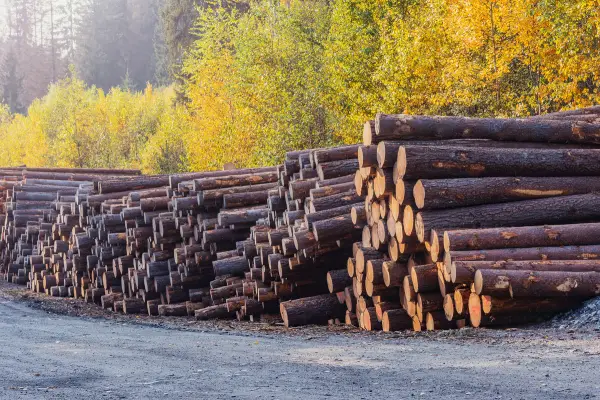
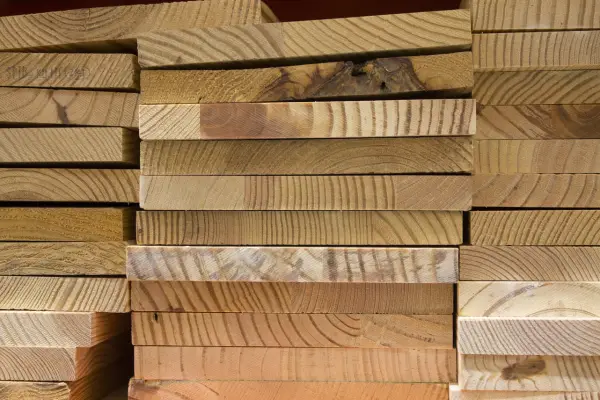
Raw timber, often known as untreated wood, consists of wood that hasn’t been subjected to any chemical modifications or treatments. Essentially, it’s the foundational canvas awaiting the artisan’s hand to sculpt and transform it into shapes of heightened durability and extraordinary uniqueness.
Types of Wood Suitable for Outdoor Use
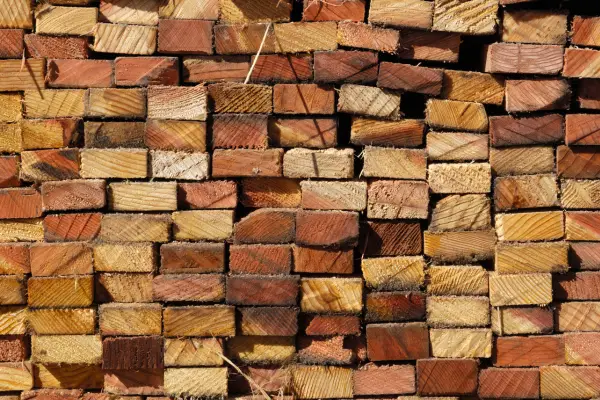
When you’re choosing wood for outdoor use, keep in mind that not all wood is cut from the same tree, so to speak. They each have their own unique traits and levels of toughness to weather the elements.
For instance, some wood is naturally more resilient to damage, decay, and insects than others, ultimately making them perfect for outdoors.
Let’s take cedar and redwood as examples. These two are like the rockstars of wood choices, especially when it comes to outdoor stuff. People love them because they’re naturally tough and easy on the eyes – that’s pretty much why they’re such big shots in the wood world.
They contain natural oils and chemicals that work as an active defense mechanism against spoilage and insect infestation.
Infused with preservatives, another popular pick can be the pressure-treated lumber. They are also highly resilient to rot, water damage, mold growth, and insects.
But here’s the thing you should keep in mind when dealing with these woods: they actually have some chemicals that might not play nice with human health. So, when you’re getting all hands-on with them, it’s smart to take some precautions and handle them with a bit of care.
Characteristics of Untreated Wood
Here’s a rundown of the main traits you’ll find in untreated wood:
- They retain their natural appearance, displaying the unique grain patterns and colors of varied wood species.
- These kinds of wood come with an organic and rustic charm that just adds a certain kind of warmth and appealing touch to the outdoor area.
- With time, they age gracefully and create a beautiful silver-gray patina – mesmerizing everyone.
- If not properly maintained, they can either crack or decay much faster compared to the treated wood.

Potential Risks and Limitations of Untreated Wood
While untreated wood definitely has its perks, it’s no stranger to potential downsides and limitations as well.
A big issue with this type of wood is how it’s like a magnet for moisture. Yep, they soak up water like a sponge, which can end up causing them to rot, grow mold, and weaken over time.
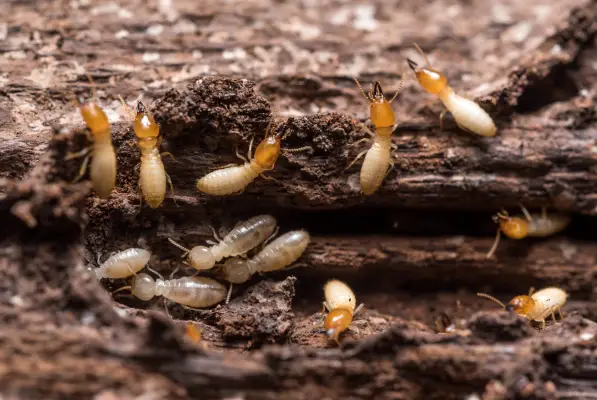
On top of that, these woods are like a five-star hotel for wood-boring insects – termites, woodworms, carpenter ants, you name it. And these little critters? They can wreak havoc on the wood, causing some serious damage.
Now the bigger question is how to solve this problem.
With some good old regular maintenance, you can definitely dial down these potential risks quite a bit. If you really want to go the extra mile, consider slapping on a waterproof sealant or using specially formulated outdoor paint – they can be real game-changers.
Pre-Treatment Preparation
Check out this lineup of steps to treat untreated wood for outdoor use and nail that pre-treatment prep like a pro:
Wood Selection and Quality Assessment
Step one? Gotta roll up those sleeves and dive into wood selection and quality checks. I mean, who wants to pour their effort into shoddy wood and watch all that hard work go down the drain, right?
So, make sure to look for wood that’s totally free from any defects like knots, cracks, or any warping.
The sturdier and more rock-solid it is, the better you can depend on it. Think of it like that faithful, unwavering friend who’s got your back through thick and thin, no matter what!
But hold on, we’re not wrapping things up just yet. See, once you’ve landed on that perfect piece, it’s time to roll up your sleeves and give it a thorough quality check.
Give it a good once-over, paying close attention for any sneaky signs of decay, fungus creeping in, or even insect-induced havoc – unless you’re cool with unexpected surprises down the line, that is.
So, don’t rush it – take the time to comb through every little nook and cranny of that wood. After all, a rock-solid foundation is the name of the game when it comes to nailing a successful project.
Cleaning and Removing Debris
Cleaning and removing debris is much like giving your wood a refreshing spa treatment. Sounds funny, right?
Well, just like a spa makes you feel at your best, similarly cleaning and removing the debris makes them super clean and fresh.
You can begin by removing the loose dirt and dust from the surface area. Then, you can gently wipe away all the dirt, using a soft brush or vacuum cleaner.
In case there are any stubborn marks to remove, it’s better to use a damp cloth or sponge for cleaning purposes.
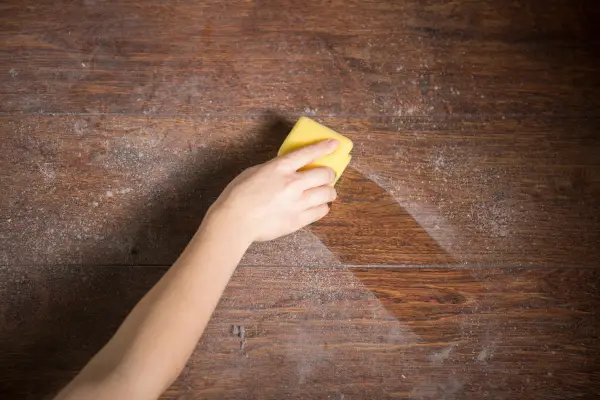
A simple trick is to give it a gentle wipe-down using a mild detergent and water solution, using a cloth or sponge. This will have it all cleaned up and ready to bid those issues farewell once and for all.
But hey, while you’re at it, remember not to get too carried away and overly soak the wood. Just a heads-up!
Here’s a tip when you need to treat untreated wood for outdoor use: If you’re thinking of using chemicals, stick to the gentle and wood-friendly cleaning agents. Not only will they give your piece a clean and polished appearance, but they’ll also ensure no harm comes its way!
Sanding and Smoothing the Wood Surface
Now that your wood is looking all spiffy and clean, it’s time to get down to some sanding and smoothing action on the surface. This way, you’ll be able to achieve that ultra-smooth texture and the fantastic finish you’re aiming for.
Here’s what to do:
Get your hands on some sandpaper or a trusty sanding block and kick things off by giving that wood a sanding session, all following the grain direction. This nifty trick helps iron out any imperfections or pesky rough patches like a charm.

Here, the ultimate goal is to create a uniform and consistent surface that is visually appealing and soothing to the touch.
For an ultra-smooth finish, kick things off with a coarser grit sandpaper and then work your way up gradually to a finer grit. It’s like giving your wood a spa day, step by step!
Just make sure to use light to moderate pressure and leave the rest to the sandpaper. Once you get that texture and feel you are aiming for, you are done!
Choosing the Right Wood Treatment Products
Similar to finding the ideal partner, selecting the right wood treatment products holds paramount significance if you’re aiming to enhance that natural beauty and provide long-lasting protection. Here’s the lineup:
Wood Preservatives and Sealants
Wood preservatives and sealants are like the best buddies for untreated wood. From improving the appearance to providing overall protection against harsh components of nature – they just work like magic!
Types of Finishes: Stains, Paints, and Clear Coatings
When it comes to treating untreated wood for outdoor use and exploring different types of finishes, there are several options to consider. First off, we have the stains.
They are like little heroes who can retain the natural beauty of the wood while also adding a touch of color. Plus, they can even go deeper into the wood, ultimately highlighting the grain and offering them a charm and rustic look – hard to resist!
Next up, we have the paints. They are those magical wands with the help of which you can color up the woods to any desired colors. From bright red to soothing blue – the list just goes on!
And for the best part, paint coatings work as an outstanding shield against UV rays and moisture – making them just perfect for outdoors.
Lastly, we have clear coatings. They are, in a word, the champs of transparency. From bringing out the best natural version without affecting the color to giving them a protective layer against everyday wear and tear – they are perfect in every possible way.
Eco-Friendly and Non-Toxic Treatment Options
In today’s era, remembering to treat untreated wood for outdoor use and picking eco-friendly and non-toxic options is more like a necessity instead of a choice. Besides, by going for these options, you are equally doing your part in contributing to a healthier planet.
So, look for products that are labeled as environmentally friendly or made from natural ingredients.
One such eco-friendly option is the usage of natural oils, for instance, linseed oil or tung oil. These kinds of oils penetrated the wood – offering the exact nourishment from within to create a waterproof barrier.
Another fantastic choice comes in the form of water-based wood sealants and finishes, which often boast low or even zero VOC (Volatile Organic Compound) content. And the cherry on top? They’re a breeze to apply and dry up in a jiffy.
Recommended Eco-Friendly Treatment Options
| Image | Title | Prime | Buy |
|---|---|---|---|
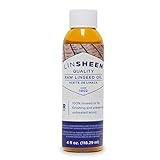 | LinSheen Raw Linseed Oil – Flaxseed Wood Treatment Conditioner to Rejuvenate, Restore and Condition Wood Patio Furniture, Decks to Kitchen Cutting Boards, 4 oz Bottle | PrimeEligible | Check My Price on Amazon |
Top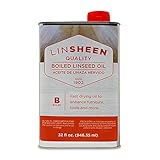 | LinSheen Boiled Linseed Oil – Fast Drying Flaxseed Wood Treatment to Rejuvenate and Restore Outdoor and Indoor Wood Furniture, Floors and Sports Equipment, Quart | PrimeEligible | Check My Price on Amazon |
 | Sunnyside Corporation 87216 1 Pint Boiled Linseed Oil | PrimeEligible | Check My Price on Amazon |
 | Furniture Clinic Boiled Linseed Oil for Wood Furniture & More Restore a Finish for Furniture, Table Tops, Stone & Metal Wood Care for Interior Oak, Pine, Teak & More Glossy 8.5oz/ 250ml Refined Oil | PrimeEligible | Check My Price on Amazon |
 | Minwax, pint 47500000 Tung Oil Finish | PrimeEligible | Check My Price on Amazon |
 | Godora 32 oz Pure Tung Oil for Wood Finishing, Wood Sealer for Indoor & Outdoor Favored by Craftsmen, Waterproofing Tung Oil for Wood Product, Perfect Food Safety Tung Oil for Furniture & Countertop | PrimeEligible | Check My Price on Amazon |
 | HOPE'S 100% Pure Tung Oil, Food Safe, Premium Waterproof Natural Wood Finish and Sealer for Indoor and Outdoor Projects, 32 Fl Oz, 1 Pack | PrimeEligible | Check My Price on Amazon |
Applying Wood Treatment
You might find it hard to believe, but when you want to treat untreated wood for outdoor use, the way you go about applying that wood treatment can make all the difference in the world. When done right, it’s almost like witnessing a breathtaking natural masterpiece unfold right in the palm of your hands.
Let’s dive into the details:
Application Techniques for Wood Preservatives
Wood preservatives are super important for protecting untreated wood from any kind of decay, insects, and weathering.
How to apply them?
Start by cleaning the surface of the wood to clear up any dust. Afterward, with the help of a brush or sprayer, apply the wood preservative thoroughly – ensuring all the exposed surfaces get fully covered. For end grains, always pay extra attention as they have more absorption power.
Recommended Wood Preservatives
| Image | Title | Prime | Buy |
|---|---|---|---|
 | Rust-Oleum 1904A Wolman (Woodlife) CopperCoat Green Wood Preservative-Below Ground, Quart | PrimeEligible | Check My Price on Amazon |
Top | Preservation Solutions - Pentacryl Gallon - Green Wood Stabilizer | PrimeEligible | Check My Price on Amazon |
 | Rust-Oleum Clear, Quart, 902 Wolman Classic Wood Preservative-Above Ground, 32 Fl Oz | PrimeEligible | Check My Price on Amazon |
 | Roxil Wood Protection Cream (1.5 Quart Clear) Instant Waterproofing Sealer, Weatherproofs: Fences, Decking, Furniture, Sheds. 10-Year Outdoor Wood Treatment | PrimeEligible | Check My Price on Amazon |
 | Tenino Copper Naphthenate 17% (2% as Metal) - 1 Gallon - Wood Preservative | Prime | Check My Price on Amazon |
Proper Application of Stains, Paints, and Clear Coatings
From enhancing the appearance to providing an additional layer of defense for treating untreated wood for outdoor use, the proper application of stains, paint, and clear coatings can truly work wonders.
However, before you begin, make sure to prepare the wood by sanding. This will help to create a smooth and even surface. Afterward, following the manufacturer’s guidelines, apply them using a brush or roller.
Don’t rush; instead, take as much time as needed to apply thin coatings – letting each layer dry properly before putting another one. This will help you to get that professional finish.
Ensuring Even Coverage and Penetration
Whether you’re dealing with wood preservatives or going for those decorative finishes, when your goal is to treat untreated wood for outdoor use, ensuring uniform coverage and thorough penetration is an absolute must. After all, the last thing you’d want are uneven spots or areas left inadequately protected.
How to do this?
Once you’ve gone through the steps we’ve laid out, take your brush or applicator and give it a go. Smooth it out while being vigilant about preventing any uneven coverage or going overboard with product in certain spots.
All of these actions will work in harmony to achieve a consistent visual charm – ensuring the treatment seeps into the wood fibers uniformly while providing robust defense against diverse elements. See also: Wood Preservation
Curing and Drying
Below is a list of the things that you need to consider while going through the curing and drying process:
Allowing Sufficient Time for Treatment to Cure
When you’ve wrapped up the treatment process, take a moment to let them properly cure and dry. Just like we all need our downtime for strength and resilience, your wood deserves some rest and adjustment to enhance its durability and resistance to decay.
Factors Affecting Drying Time
Drying wood is a delicate process that is greatly affected by various factors. Kind of like finding the perfect balance between too much and too little.
Sometimes, a small slip-up can be all it takes to throw a wrench in the works. Take high temperatures, for instance – they can put the pedal to the metal on the drying process. However, if things get too hot and bothered, there’s a chance those poor pieces might end up cracking.
Switching gears, when it comes to humidity, things can get interesting. High humidity levels can put the brakes on the whole process, while low levels can hit the accelerator. However, if humidity goes into overdrive, it might lead to a case of extreme dryness and shrinkage.
Monitoring and Maintaining Optimal Moisture Content
Keep an active eye on the moisture content to get the desired outcome. Aim for an optimal range that is well-suited to that specific type of wood.
To keep things on track, enlist the aid of a moisture meter. This handy tool lets you keep tabs on the wood’s moisture levels, enabling you to make timely adjustments as required.
For instance, if the moisture content skews too high, you can stretch out the drying period or amp up the airflow. Conversely, if it dips too low, you might need to tweak the environment to prevent that dreaded excess dryness.
Approach this step with utmost care, as your vigilant monitoring and diligent maintenance of the ideal moisture level will determine whether your wood is in its prime condition or headed in the opposite direction.
Recommended Moisture Meters
| Image | Title | Prime | Buy |
|---|---|---|---|
 | Wood Moisture Meter Two Pins Wall Moisture Detector Paper Humidity Tester for Wood Building Material Firewood Moisture Meter Walls Paper Floor (Orange) | PrimeEligible | Check My Price on Amazon |
Top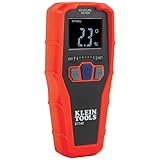 | Klein Tools ET140 Pinless Moisture Meter for Non-Destructive Moisture Detection in Drywall, Wood, and Masonry; Detects up to 3/4-Inch Below Surface | PrimeEligible | Check My Price on Amazon |
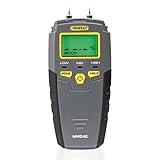 | General Tools MMD4E Digital Moisture Meter, Water Leak Detector, Moisture Tester, Pin Type, Backlit LCD Display With Audible and Visual High-Medium-Low Moisture Content Alerts, Grays | PrimeEligible | Check My Price on Amazon |
 | Wood Moisture Meter (Pinless-colors) | PrimeEligible | Check My Price on Amazon |
 | Wood Moisture Meter - Digital Moisture Detector Moisture Tester, Pin-Type Water Leak Detector Damp Tester Dampness Meter for Wood Building Material Firewood Walls Paper Floor (Sliver) | PrimeEligible | Check My Price on Amazon |
 | ERICKHILL Wood Moisture Meter, Poket Size Wood Moisture Detector with Green Backlight LCD Display, Pin Type Water Leak Detector with 5 Modes for Wood, Walls, Firewood, Bricks, Lumber, Floor | PrimeEligible | Check My Price on Amazon |
 | AMERICAN MUTT TOOLS Pinless Moisture Meter | Non-Destructive Wood Moisture Meter for Walls, Drywall, Wood and Masonry | Moisture Detector for Walls, Moisture Meter Drywall Pinless, Moisture Sensor | PrimeEligible | Check My Price on Amazon |
Maintaining Treated Wood
If you want to have a long-term relationship with your wood project, make sure to follow the tips below.
Regular Inspection and Maintenance Practices
The ultimate secret to keeping your treated wood in tip-top shape lies in consistent inspection and maintenance practices.
Let’s say you’re in the habit of giving them a regular check. Well, that means you’re likely to spot any potential issues even before they have a chance to rear their heads. So, you can tackle the problem right then and there, nipping it in the bud before it spirals out of control.
Repairing and Refinishing Treated Wood
In case you notice any damage to the wood, don’t get stressed out!
Fixing them is a breeze if you just stick to a few straightforward steps. Start off by giving those damaged spots a sanding session to level them out. Then, apply a wood filler to fill in any gaps. Once it’s all dried up, grab the sandpaper and give it a gentle sanding for that flawless, glossy finish.
For refinishing, you have got a wide series of wood stains or coatings to choose from to give your treated wood that clean and professional look.
Cleaning and Protecting Treated Wood Surfaces
As time goes by, everything has a tendency to accumulate dirt and dust – and that includes treated wood surfaces too.
But here’s the silver lining: cleaning treated wood is a cakewalk once you’ve got the know-how. Just snag a bucket, whip up a concoction of mild soap and water, then take a soft brush and give the wood a nice, easy scrub. Finish up by rinsing it off with some running water.
Ta-da! It’ll be gleaming like it just rolled off the factory floor.
For added protection, you can consider applying a wood sealant or preservative, as mentioned above. Or maybe go for a waterproofing product. They are pretty effective and helpful in terms of water damage and lessening the other damage chances.
Recommended Waterproofing Products
| Image | Title | Prime | Buy |
|---|---|---|---|
| Roxil Wood Protection Cream (1.5 Quart Clear) Instant Waterproofing Sealer, Weatherproofs: Fences, Decking, Furniture, Sheds. 10-Year Outdoor Wood Treatment | PrimeEligible | Check My Price on Amazon |
Top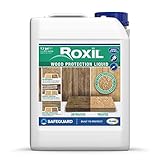 | Roxil Wood Waterproofing Sealer (1.3 Gallon Clear) 10 Year Outdoor Wood Treatment, Wood Preserver for Decking, Fence, Sheds and Furniture | PrimeEligible | Check My Price on Amazon |
 | Thompson's WaterSeal TH.024101-16 Multi-Surface Waterproofer, Clear, 1 Gallon | PrimeEligible | Check My Price on Amazon |
 | Rain Guard Water Sealers - Wood Sealer - Penetrating Water Repellent Protection for All Porous Wood Surfaces - Water-Based Silane/Siloxane Sealant - Clear Natural Finish - Concentrate Makes 1 Gal | Prime | Check My Price on Amazon |
 | Thompson's Water Seal Transparent Wood Sealer, Natural Cedar, 1 Gallon | PrimeEligible | Check My Price on Amazon |
 | Garden Box Sealer | FDA Food Contact Safe Plant-Based Wood Sealant for Raised Beds, Planters & Pet Houses. Protects All Wood Types from Water & Weather Damage | Eco-Friendly Sustainable Solution | PrimeEligible | Check My Price on Amazon |
 | Thompsons Water Seal 21801 1-Gallon Clear Waterproofed Plus Clear Wood Protector | PrimeEligible | Check My Price on Amazon |
Enhancing Longevity and Protection
Looking to extend the lifespan and take that protection up a notch? Take a moment to check out the strategies listed below:
Additional Measures for Extending Wood’s Lifespan
Who can resist the allure of something built of wood, right? But let’s face it, things take a turn for the worse when they begin to show signs of wear and tear.
It can be such a pain in the neck!
Thankfully, with a few helpful tips in your back pocket for treating untreated wood for outdoor use, you can significantly prolong their lifespan. Ever thought about treating them with preservatives? It’s like waving a wand of protection that keeps insects and decay at bay. The best part? You can easily find these products to match your specific needs.
Another good trick is to keep them away from direct contact with the ground. Why?
Moisture sure knows how to stir up trouble, often leading to serious wood decay. But fear not! Elevating the wood using concrete blocks or pressure-treated lumber is a nifty solution. It puts the brakes on moisture seeping up from the soil, truly a game-changing trick!
Last but certainly not least, never underestimate the impact of regular maintenance. Keep a vigilant eye out for potential damages, and if you spot any, tackle them pronto. Remember, the quicker, the better!
Using Protective Coatings and Sealants
When it’s time to treat untreated wood for outdoor use, keep in mind that protective coatings and sealants step up as the true heroes in ensuring your wood remains shielded from any potential damage in the long haul.
How?
Well, they create such a strong barrier between the surface and the outside world that no scratch, UV damage, or even moisture can pass them.
On the other hand, the sealants are like knights in shining armor. From preventing any kind of moisture penetration to building a strong, water-repellent shield to keep the components at bay – the right one really can do wonders!
Recommended Sealants
| Image | Title | Prime | Buy |
|---|---|---|---|
| Garden Box Sealer | FDA Food Contact Safe Plant-Based Wood Sealant for Raised Beds, Planters & Pet Houses. Protects All Wood Types from Water & Weather Damage | Eco-Friendly Sustainable Solution | PrimeEligible | Check My Price on Amazon |
Top | Seal-Once Marine Premium Wood Sealer - Waterproof Sealant - Wood Stain and Sealer in One - 1 Gallon & Clear | PrimeEligible | Check My Price on Amazon |
| Rain Guard Water Sealers - Wood Sealer - Penetrating Water Repellent Protection for All Porous Wood Surfaces - Water-Based Silane/Siloxane Sealant - Clear Natural Finish - Concentrate Makes 1 Gal | Prime | Check My Price on Amazon |
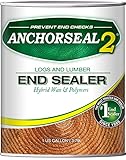 | ANCHORSEAL 2 Hybrid Log & Lumber end Grain Sealer - Water-Based Wax & Polymer Prevents up to 90% of end Checking (Drying Splits) on Cut Ends. Green Wood Sealer for Turning Blanks & Bowls. (1 Gallon) | PrimeEligible | Check My Price on Amazon |
 | Garden-Seal NonToxic Wood and Pottery Sealer | Prime | Check My Price on Amazon |
 | Rain Guard Water Sealers SP-1102 Gloss Sealer Concentrate - Glossy Water Repellent for Wood, Concrete, Brick, Stone, and Masonry - Covers up to 200 Sq. Ft, 32 fl oz (Makes 1 Gallon) | Prime | Check My Price on Amazon |
 | Gorilla Waterproof Patch & Seal Liquid, Clear, 16 Ounces, (Pack of 1) | PrimeEligible | Check My Price on Amazon |
Implementing Proper Drainage and Air Circulation
Shifting our focus to proper drainage and air circulation – these are akin to potent tools that can either be your success story or lead to downfall. So, be sure to tend to them diligently, without compromise!
Inadequate drainage can wreak havoc on your entire foundation, directing water to collect and pool around, causing potential trouble.
To ward off this issue, make certain your gutters and downspouts are entirely clear of debris and directed away from your house. Another smart move is to consider adding a slope or grading the soil, which can effectively encourage proper runoff.
When it comes to air circulation, prioritize ventilation throughout the surrounding spaces. For instance, you can keep windows open and utilize exhaust fans in bathrooms and kitchens to maintain a healthy airflow.
Above all, ensure that all air vents remain clean and unblocked. This practice will help maintain optimal moisture levels and deter the unwelcome arrival of guests like mold.
Safety Considerations
From safeguarding the environment to looking out for everyone’s well-being – be sure to keep a vigilant eye on the safety considerations outlined below:
Protective Measures when Working with Wood Treatments
Whenever you’re getting hands-on with wood treatment products, it’s a must to sport the right protective gear. That could include gloves, safety glasses, and a trusty mask.
Think of it less as a hassle and more like suiting up in a superhero ensemble – think Superman. After all, if you’re not in good shape, all that effort you’ve put in will end up going down the drain!
Disposal of Wood Treatment Products
Once you’ve wrapped up the treatment process, you might be left with some leftovers that need prompt disposal.
But hold on, these aren’t the run-of-the-mill items you can just toss out casually. Instead, you’ll need to adhere to a proper disposal procedure. This not only helps protect the environment but also prevents any potential hazardous situations from cropping up.
What to do?
Well, first check the product label in case there are any particular guidelines regarding the disposal of the product. Follow them accordingly (if any).
If you’re left without specific disposal instructions, you can handle it this way: for liquid wood treatment remnants, mix them with an absorbent material like sawdust in small amounts. This will solidify the mixture, making it simpler to dispose of. Then, place this solution in a properly sealed container and follow local regulations for appropriate disposal.
If you find yourself dealing with a larger quantity or you’re feeling completely uncertain about the disposal process, it’s a wise move to turn to your local waste management facility or the environmental agency for assistance. They’re the experts who are well-versed in how to handle these substances safely and properly. Also see: Compost Wood Chips Faster
FAQs
From temperature to humidity and the kind of wood treatment used – there are several factors that can indeed affect the drying time of the treated wood. Such as hot weather and low humidity can speed up the process, with cool temperatures and high humidity levels slowing them down.
Yes. In terms of wood treatment, a sprayer can give you more coverage, while a brush lets you work the treatment right into the wood.
Absolutely! Some wood treatments might darken the wood, while others might give them a glossy or matte finish.
Linseed oil, tung oil, vinegar, and beeswax are some of the popular or homemade alternatives for wood treatment.
Wood treatment products tend to contain chemicals that can drain into the oil or waterways – eventually affecting the lives of plants and animals. However, you can greatly minimize it by going for environmentally friendly treatments along with following proper disposal instructions as guided.
Final Thoughts on How to Treat Untreated Wood for Outdoor Use
Treating untreated wood isn’t just an optional step; it’s a pivotal phase in crafting resilient structures that stand the test of time and diverse weather conditions with exceptional grace.
Whether it’s a picturesque garden bench or an elaborate pergola, the possibilities are endless.
Now equipped with the knowledge of how to treat untreated wood for outdoor applications, it’s time to roll up your sleeves, grab those tools, and fashion a masterpiece that leaves everyone in awe. Get to work and enjoy the process!

Darrell has a passion for gardening that he inherited from his father. Go here to read more about the influence his father played in his love for gardening. If you want to send Darrell a quick message, then visit his contact page here.


![10 Common Container Garden Mistakes to Avoid [Beginner’s Guide]](https://wraxly.com/wp-content/uploads/2021/02/10-Common-Container-Garden-Mistakes-to-Avoid-Beginners-Guide-1200-1024x576.webp)