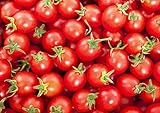
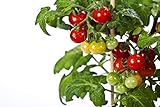
Cherry tomatoes make for a delicious and versatile addition to a garden, and growing them can be fun. However, it can also be a frustrating experience if you don’t follow the right steps, especially when it comes to growing them in pots.
That’s why I have come up with this guide with a detailed step-by-step method for growing cherry tomatoes in pots. So, read each step carefully to make sure you maximize your yields.
- Growing Cherry Tomatoes in Pots: A Step-by-Step Guide
- Step 1: Choose the Right Cherry Tomato Variety
- Step 2: Select the Right Pot
- Step 3: Wait for the Right Time of the Year
- Step 4: Choose the Right Spot
- Step 5: Plant the Seeds/Seedlings
- Step 6: Support the Plants
- Step 7: Meet the Plants’ Watering and Fertilizing Needs
- For Further Reading
- Step 8: Deal with Diseases and Pests
- Step 9: Harvest the Cherry Tomatoes
- Final Words
Growing Cherry Tomatoes in Pots: A Step-by-Step Guide
Here are all the steps you need to grow cherry tomatoes in pots effectively.
Step 1: Choose the Right Cherry Tomato Variety
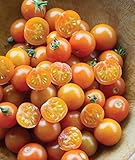
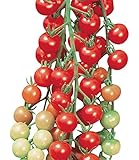
While it’s possible to grow almost all types of cherry tomatoes in plant pots and fabric grow bags, you should consider using the ones that generate high yields. I’ve created a list of the best varieties to choose from.
Make sure that you understand the following definitions before going through the table.
- Determinate: These cherry tomato plants reach a certain height, after which they stop growing. Additionally, all the fruits (yes, tomato is a fruit) on determinate plants ripen at approximately the same time.
- Indeterminate: Usually, indeterminate tomatoes have a longer growing season, and they also reach taller heights than the determinate ones. In addition, these plants continue to produce fruits until they reach the first frost.
| Variety | Plant Height | Fruit Size | Taste | Matures in | Type | Hanging |
| Heartbreaker | 20 inches | 1-1.5 inches | Sweet and sour | 70-84 days | Determinate | Yes |
| Gold Nugget | 24 inches | 1-1.5 inches | Sweet | 65-85 days | Determinate | Yes |
| Micro-Tom | 6-8 inches | 0.75-1 inches | Sharp and sweet | 80-90 days | Indeterminate | Yes |
| Tidy Treats | 3-5 inches | 1 inch | Sweet | 50-55 days | Determinate | No |
| Sweet Million | 4-6 inches | 1-1.5 inches | Sweet and tangy | 50-79 days | Indeterminate | No |
| Supersweet 100 | 8-12 inches | 1 inch | Very sweet (a bit acidic) | 65 days | Indeterminate | No |
| Little Bing | 18-24 inches | 1 inch | Mild sweet (Flavorful) | 60 to 65 days | Indeterminate | Yes |
| Sungold | 6-12 inches | 1 inch | Rich and sugary | 65 to 70 days | Determinate | No |
| Terenzo F1 | 16-20 inches | 1.25 inches | Sweet | 56 days | Determinate | Yes |
| Tiny Tim | 12 inches | 0.5-0.75 inches | Sweet and tart | 60 days | Determinate | Yes |
Step 2: Select the Right Pot
Once you have selected the cherry tomato variety you want to grow, the next step is to choose the right pot for your plants. The pot size will depend on the cherry tomato type.
If you’re going with a determinate one, you’ll need to opt for a pot at least 15 inches wide. But if you’re planning to grow an indeterminate type, I recommend you opt for a pot with at least 24 inches (2 feet) of width.
In both cases, the pot depth must be at least 12 inches, and it should also be well-drained. It’ll allow you to easily place 3 to 5 gallons of soil in the pot, which is important for cherry tomatoes.
Step 3: Wait for the Right Time of the Year
All cherry tomato varieties thrive in sunny and warm climates. They need at least 6 to 8 hours of sunlight daily to grow healthy. Therefore, you’ll need to wait until the soil temperature is around 60 degrees Fahrenheit.
Additionally, 60 to 85 degrees Fahrenheit is the ideal air temperature for these plants. If you plant them when the air temperature is lower than that, they’ll show very slow growth, and their likelihood of falling victim to pests and diseases will also be high.
If the air temperature exceeds 85 degrees Fahrenheit, the fruits won’t ripen or drop from the flowers. Therefore, you want to ensure you choose the correct time to maximize the yields.
Step 4: Choose the Right Spot
As mentioned in the previous point, cherry tomatoes thrive in the heat. So, choose a spot for your pots that receive at least 6 hours of sunlight daily. While 8 hours are ideal, 6 hours can also work if you strictly follow the temperature guidelines provided earlier.
Step 5: Plant the Seeds/Seedlings
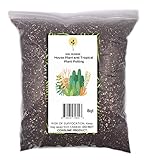
Once everything is ready, you can start planting the seeds or seedlings (as desired). You can buy any of these options from a local nursery or garden center. But make sure you fill your pots with high-quality organic soil which doesn’t contain synthetic fertilizers.
Recommended Potting Soil for Cherry Tomatoes
| Image | Title | Prime | Buy |
|---|---|---|---|
 Top
Top
Top
Top | Miracle-Gro Potting Mix 2 cu. ft. | PrimeEligible | Check Price on Amazon |
 Top
Top
Top
Top | Burpee Premium Organic Potting Mix, 9 quart | PrimeEligible | Check Price on Amazon |
Top Top
Top
Top
Top | FoxFarm Ocean Forest Potting Soil Mix Indoor Outdoor for Garden and Plants | Plant Fertilizer | 12 Quart + THCity Stake | PrimeEligible | Check Price on Amazon |
 | Espoma Organic Potting Soil Mix - All Natural Potting Mix For Indoor & Outdoor Containers For Organic Gardening, 8 qt, Pack of 1 | PrimeEligible | Check Price on Amazon |
 | Miracle-Gro Indoor Potting Mix 6 qt., Grows beautiful Houseplants | PrimeEligible | Check Price on Amazon |
 | House Plant and Tropical Plant Potting Soil - Re-Potting Soil for All Types of Indoor House Plants, House Plant Re-Potting Soil - 8QTs | PrimeEligible | Check Price on Amazon |
 | Espoma 16 qt. Organic Seed Starter Premium Potting Mix (2) | Prime | Check Price on Amazon |
 | Fort Vee Compost-Based Potting Mix, 18 Pounds, Organic Nutrient-Boosted Potting Mix | Prime | Check Price on Amazon |
If you go with seeds, make sure that you plant them in trays and keep them indoors for about six weeks before transferring them to pots. It’ll turn them into seedlings that you can plant in your pots.
While many gardeners suggest that you should plant the seedlings into a small pot (3–5-inch diameter) for some time before transferring them to the final planter, it’s not necessary. You can add them directly to the big pot if all the steps discussed so far are followed properly.
Recommended Cherry Tomato Seeds
| Image | Title | Prime | Buy |
|---|---|---|---|
 | 30+ Sweetie Cherry a.k.a. Sugar Sweetie Tomato Seeds, Heirloom Non-GMO, Extra Sweet, Heavy-Yielding, Indeterminate, Open-Pollinated, Delicious, from USA | PrimeEligible | Check Price on Amazon |
Top | Sunsugar Hybrid - Tomato Seeds | PrimeEligible | Check Price on Amazon |
 | Sow Right Seeds - Cherry Tomato Seed Collection for Planting - Large Red Cherry, Yellow Pear, White, and Rio Grande Cherry Tomatoes - Non-GMO Heirloom Varieties to Plant and Grow Home Vegetable Garden | PrimeEligible | Check Price on Amazon |
 | Small Red Cherry Tomato Seeds, 500 Heirloom Seeds Per Packet, (Isla's Garden Seeds), Non GMO Seeds, Botanical Name: Solanum lycopersicum | PrimeEligible | Check Price on Amazon |
 | Burpee Sun Gold Hybrid Non-GMO Home Garden | Sweet Orange Cherry Tomatoes | Best Vegetable Planting, 30 Seeds | PrimeEligible | Check Price on Amazon |
 | Burpee Super Sweet 100' Hybrid Cherry Tomato, 50 Seeds | PrimeEligible | Check Price on Amazon |
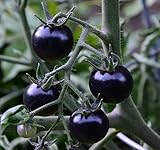 | 500+ Black Cherry Tomato Seeds for Planting | PrimeEligible | Check Price on Amazon |
 | 50 Tiny Tim Tomato Seeds - Patio Tomato, Dwarf Heirloom, Cherry Tomato - by RDR Seeds | PrimeEligible | Check Price on Amazon |
To plant your seedlings into the pot, use the following steps:
- Press your fingers into the soil gently to create a small hollow/depression.
- Make sure the depression is spacious enough to easily fit the seedling and surrounding soil.
- Place the seedling into the depression while making sure that its roots are well-centered and spread out.
- Cover the roots with the surrounding soil and press it down slightly (if needed) to ensure stability.
Step 6: Support the Plants
Once the plant is in the pot, it’ll start to grow, and you’ll need to ensure that you provide it with everything it needs to thrive and remain healthy.
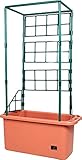
Most cherry tomatoes grow in large clusters, weighing the plant down. Not only will it strain branches, but it can also stress the entire plant. The easiest way to get rid of this problem is to stake your plants using bamboo or wooden poles.
Additionally, you can also buy a cage from a local nursery for the same purpose. You’ll only need to insert the cage into your planter, and the plants will start using this support automatically as they grow.
Recommended Tomato Supports
| Image | Title | Prime | Buy |
|---|---|---|---|
Top | Esbaybulbs Plant Support Cages Tomatos Stake 1.2m Multi-fuction Garden Trellis for Climbing Plants, Vines, Flower, Vegetables and Potted Plants 2 Pack | PrimeEligible | Check Price on Amazon |
 | 4 Pack Garden Plant Support Tomato Cage, Upgrade 24" Trellis for Climbing Plants, Plant Trellis Kits with 4 Self Watering Spikes and 20 Plant Clips (24") | PrimeEligible | Check Price on Amazon |
 | Hydrofarm GCTR 10 Gal Tomato Garden Planting Grow System with 4 Foot Trellis Wheels for Indoor/Outdoor Climbing Vines & Flowers Tree Tower, Green | PrimeEligible | Check Price on Amazon |
 | Tomato Cages for Garden, 2 Packs 48" Plant Support Tomato Trellis for Climbing Plants Outdoor Indoor & Pots with 18Pcs Retractable Steel Core Plant Stakes, 6 Shape-adjustable Rings | PrimeEligible | Check Price on Amazon |
Step 7: Meet the Plants’ Watering and Fertilizing Needs
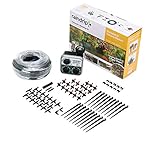
One of the trickiest parts of growing cherry tomatoes in pots is meeting their watering needs. That’s because they’ll receive a lot of sunlight during the day, which can dry them out pretty quickly.
Therefore, you’ll need to make sure that you inspect your plants frequently. It’ll allow you to water the plants whenever needed and prevent them from drying out.
But it’s important not to overwater your cherry tomato plants, as it’ll make them weak and affect the yield. Your goal is to keep the soil evenly moist, and it can be achieved by watering your plants once a day.
Recommended Tomato Watering Systems
| Image | Title | Prime | Buy |
|---|---|---|---|
 | Flantor Garden Irrigation System, 1/4" Tubing Watering Drip Kit Automatic Irrigation Equipment Set | PrimeEligible | Check Price on Amazon |
Top | Rain Bird SWDMSPKIT Drip Irrigation Spot Watering Manifold on a Spike Kit, Bubblers and Emitters | PrimeEligible | Check Price on Amazon |
 | Automatic Watering System with 30-Day Watering Cycle Timer | PrimeEligible | Check Price on Amazon |
 | Orbit 57946 B-hyve Smart 6-Zone Indoor/Outdoor Sprinkler Controller, Compatible with Alexa, 6 Station | PrimeEligible | Check Price on Amazon |
 | Raindrip R560DP Automatic Watering Kit for Container and Hanging Baskets, Water up to 20 plants with this kit , Black | PrimeEligible | Check Price on Amazon |
Other than that, you’ll also need to fertilize the plants so that you can have a large harvest. I recommend you go with 20-20-20 water-soluble fertilizer. It means it should contain 20% of each nutrient, including potassium, phosphorus, and nitrogen.
Step 8: Deal with Diseases and Pests
Just like large tomatoes, these plants are also susceptible to some diseases and pests. The common ones include viruses, blight, wilt, and hornworms.
Consider using non-toxic, biodegradable, and soap-based insecticides to keep pests at bay. Whereas you’ll need to follow prevention techniques to protect your plants from diseases.
Here’s a list of tips that you can follow.
- Place your plants with sufficient space between them to promote good air circulation, which can help reduce the spread of diseases.
- Water the plants at the base to keep leaves dry, as wet foliage can encourage disease development.
- Apply a layer of organic mulch around the base of the plants to prevent soil-borne pathogens from splashing onto leaves during rainfall.
- Inspect your plants regularly for any signs of disease, and remove and dispose of affected leaves to prevent further spread.
- Pests can weaken plants and make them more susceptible to diseases, so keep a watchful eye and take action if pests are detected. See also: How to Use Neem Oil on Tomato Plants
- Clean and sanitize gardening tools between uses to avoid transmitting diseases from one plant to another.
- Prune the plants from time to time to promote good air circulation and reduce overcrowding. It can help you keep diseases at bay and increase the yield as well.
- Maintain soil health through proper fertilization and amendment, which can enhance the plant’s natural resistance to diseases.
Recommended Fertilizers for Tomatoes
| Image | Title | Prime | Buy |
|---|---|---|---|
 Top
Top | Tomato-tone Organic Fertilizer - FOR ALL YOUR TOMATOES, 4 lb. bag | PrimeEligible | Check Price on Amazon |
Top Top
Top | Dr. Earth Organic 5 Tomato, Vegetable & Herb Fertilizer Poly Bag | PrimeEligible | Check Price on Amazon |
 Top
Top | Neptune's Harvest Tomato & Veg Fertilizer 2-4-2, 36 oz | PrimeEligible | Check Price on Amazon |
 Top
Top | Ludicrous Nutrients Big Ass Tomatoes Premium Gardening Fertilizer Nutrients Indoor or Outdoor Works with All Vegetables, Plants (1.5 lbs) | PrimeEligible | Check Price on Amazon |
 Top
Top | Espoma Tomato! Liquid Plant Food, Natural & Organic Tomato & Vegetable Food, 18 fl oz, Pack of 2 | PrimeEligible | Check Price on Amazon |
 Top
Top | Tomato Fertilizer by EZ-gro is a High Potassium Fertilizer for Your Tomato Plants | Field Tested Tomato Plant Food for Vegetables | A Concentrated Liquid Tomato Plant Fertilizer | 1 Quart | PrimeEligible | Check Price on Amazon |
Step 9: Harvest the Cherry Tomatoes
Once your cherry tomatoes have become shiny and their color has turned deep (it takes around 60 days for most varieties), it’s time to harvest them. You can also determine if the fruits are ready by touching them.
If they feel somewhat tender to touch, you can remove them from plants.
Make sure that you remove the tomatoes with a gentle tug instead of twisting them because it can cause harm.
Important Note: If you fail to harvest your cherry tomatoes in time, they’ll split open.
Final Words
Growing cherry tomato plants in pots can be a fun and rewarding experience. It can provide you with a handsome tomato yield that you can use all summer long.
But it’s important to make sure that you follow the steps discussed in this guide carefully to keep your plants healthy and achieve desired results.
Darrell has a passion for gardening that he inherited from his father. Go here to read more about the influence his father played in his love for gardening. If you want to send Darrell a quick message, then visit his contact page here.
![How to Water Indoor Plants [Plant Care 101]](https://wraxly.com/wp-content/uploads/2021/03/How-to-Water-Indoor-Plants-Plant-Care-101-1200-1024x576.webp)
![Growing Plants from Cuttings [A Simple Guide]](https://wraxly.com/wp-content/uploads/2021/03/Growing-Plants-from-Cuttings-A-Simple-Guide-1200-1024x576.webp)