One of the most important aspects of growing healthy hydrangeas is having the right type of soil.
Hydrangeas prefer loam-type soil (a mix of clay, sand, and organic matter) that is rich in organic matter, can retain moisture and drains well. They’re susceptible to root rot. So, it is important to make sure the soil is not too dense or too wet. Also, the pH level can make a huge difference in the color of their blooms.
The best way to achieve the perfect balance is to start with a good-quality soil mix and then add amendments as needed. This guide will detail everything you need to know about preparing the best soil for hydrangea.

Hydrangeas Soil Type
Hydrangeas are known for their large, showy blossoms and their ability to thrive in a variety of soil types.
While hydrangeas can grow in almost any type of soil, they prefer organic living soil rich in organic matter. This type of soil will help to keep the plants’ roots moist and provide the nutrients the plant needs to grow.
How Do Hydrangeas Do in Clay or Slit Soils?
If you live in an area with heavy clay soil, you may need to take special measures to ensure that your hydrangeas get the drainage they need.
Clay soil is made up of very small particles that bind together to form dense, compacted soil. This type of soil can be difficult to work with for growing hydrangeas because it can be hard to dig and aerate. Clay soils can also be susceptible to waterlogging and drainage problems.
If you have no other option than heavy clay soil, you may need to improve the drainage by adding organic matter such as compost or peat moss. Or simply consider planting your hydrangeas in raised garden beds or on mounds. This will help to improve drainage and prevent the roots from sitting in water.

How Do Hydrangeas Do in Sandy Soils?
Sandy soils are not as dense as other types of soils but are made up of larger particles than clay soil. This type of soil is easier to work with and is good for drainage. This can be a good thing for hydrangeas because they are susceptible to root rot from overwatering.
However, it is important to make sure that the soil is not too dry. Sandy soils can be prone to drought and quickly become parched because they don’t hold water as well as clay soils, so it is important to water hydrangeas regularly, especially during hot, dry weather.
The Best Soil for Hydrangea – Loam
When it comes to the best soil for hydrangea, there are a few things to keep in mind. For instance, you would be better off using soil that is slightly acidic for hydrangeas; to be more precise, a pH of 6.5 is ideal. And most importantly, the soil should be well-draining yet moist.
For that reason, the best soil for hydrangea is loamy soil, as it contains a mix of sand, silt, and clay particles. Loam is rich in nutrients and holds moisture well, making it ideal for hydration. This type of soil also drains excess water quickly.
However, choosing the ideal soil only isn’t going be enough; Hydrangeas need to be fertilized regularly to thrive. A general-purpose fertilizer high in phosphorus will help encourage blooming. It is best to apply fertilizer in the spring and early summer.
Tip: If you live in an area with hot summers, you may need to provide some afternoon shade for your hydrangeas to prevent them from wilting.
Also, you need to amend it with organic matter to improve drainage and moisture retention if your soil becomes too sandy or too clay-like over time. We’re going to talk about it in more detail in the next section.

Preparing Your Soil for Hydrangeas
Preparing your soil for planting hydrangeas is an important step in ensuring that your plants will thrive. Here are some tips on how to prepare your soil:
- Start by testing the pH level. Hydrangeas prefer soils with a pH level of 6.0 to 7.0. You can test your soil’s pH level with a simple kit from your local nursery or garden center. If your soil is too acidic or too alkaline, you can adjust the pH level later.
- If you are planting hydrangeas in a new garden bed, be sure to amend the soil with plenty of organic matter (in the form of compost, manure, or peat moss) before planting. You can also add a layer of mulch around the plants to help keep the roots cool and moist. This will help to improve drainage and aeration.
Note: When it comes to fertilizer, hydrangeas are not heavy feeders. A light application of a balanced fertilizer in the spring is all that Hydrangeas need. Be sure to avoid over-fertilizing, as this can lead to leaf burn.
- After you’ve amended the soil, it’s time to plant your hydrangeas. Dig a hole twice as wide as the plant’s root ball. The roots will have space to expand out. After placing the plant, fill the hole back with soil. Firm the soil around the plant to ensure good contact between the roots and the soil.
Note: Be sure to plant them in an area that receives plenty of sunlight. Hydrangeas need at least six hours of sunlight per day to thrive.
- Once your plants are in the ground, water them deeply to saturate the roots. Hydrangeas are drought-tolerant, but they will produce more flowers if they are kept moist. By providing the roots with the proper environment, you will be well on your way to growing healthy and beautiful plants.
Preparing Soil for Hydrangeas in Ground vs. in Pot
When it comes to hydrangeas, the soil you plant them in makes all the difference. Whether you’re growing hydrangeas in-ground or in a pot, the process is similar.
However, there are a few key differences. Here are a few tips to keep in mind:

For plants in the ground:
- Choose a location that has well-drained soil and gets access to the full sun.
- Amend the soil with organic matter such as compost, leaves, manure, or peat moss to help hold moisture. You can also use regular bagged compost for your garden.
For plants in pots:
- Choose a pot that is large enough to accommodate the roots of your plant, with a few inches of extra space at the top
- Fill the pot with a high-quality potting mix that is designed for drainage
- Add organic matter to the potting mix in the form of compost, vermiculite, or perlite
- Add a layer of organic mulch to the top of the soil to help retain moisture
- Ensure a good draining system
Following these tips will help you prepare the best potting soil for hydrangeas.
Soil Amendment Techniques for Blue/Pink Flowers
Till now, we’ve only talked about health. But what about looks? After all, that’s why you’re planting hydrangeas in the first place.
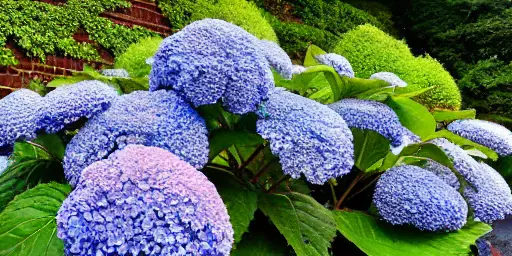
Hydrangeas bloom flowers of two colors: Blue and Pink. But what if they’re pink, but you want them blue, or the other way around? Can you change the color to your liking? The answer is: yes! How? Let’s start with the basics.
The bloom color depends on two things: soil pH and the presence of Aluminum.
If you didn’t check the pH of your soil during preparation, you can get a quick and easy test from a garden center.
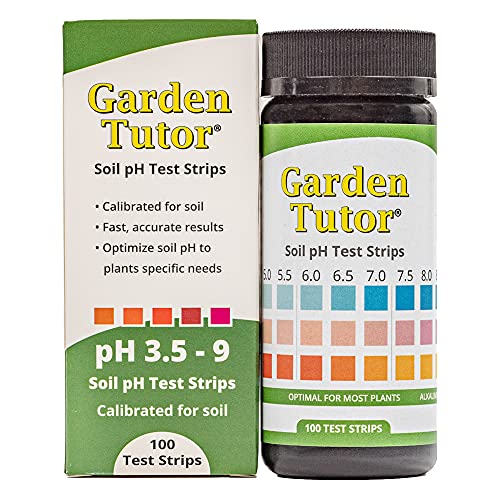
- Calibrated specifically for soil pH testing with fast and accurate soil test results in 60 seconds at home
- 2nd Generation simplified 3 pad design for improved accuracy to easily optimize soil pH.
- Enough soil test strips for 100 soil pH tests - Since soil pH can vary in different areas it is important to take multiple soil pH tests around your property. Essential for lawn soil pH testing and adjustments.
- Optimize soil pH to plants specific needs to increase nutrient availability. Proper soil pH is an essential key needed to unlock nutrients in your soil and make them available to plants. Great for indoor and outdoor applications. Houseplants, flowers, herbs, potted plants, annuals, perennials, trees, shrubs, fruits, and vegetables benefit from proper pH levels.
- Includes detailed full color pH testing handbook with lime and sulfur application cha
The general rule of thumb is that if your pH is above 6.0, you’ll see pink blooms. And if you’re below 6.0, you’ll see Blue. However, there are exceptions. If you’re in that 6.0-7.0 pH range, you’re technically in acidic or basic soil, but you may see either color blooms.
How to Adjust pH for Blue Flowers?
If your soil is in a pH above 7.0, and you want Blue blooms, here’s what you need to do.
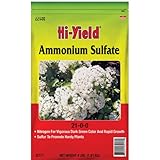
Buy an Aluminum Sulfate or Soil Acidifier from your local garden center. This is gonna lower the pH of your soil so that you have an acidic soil below a pH of 6.0.
Once it’s below 6.0, the plant is then able to absorb Aluminum from the soil, which is what actually turns the blooms Blue or Blue Purple, depending on what variety you have.
Recommended Aluminum Sulfate Products
| Image | Title | Prime | Buy |
|---|---|---|---|
 Top
Top | Pure Original Ingredients Aluminum Sulfate (2 lb) Food Grade, Iron Free, Soil Additive | PrimeEligible | Check My Price on Amazon |
Top Top
Top | Pure Original Ingredients Aluminum Sulfate (4 oz) Food Grade, Iron Free, Soil Additive | PrimeEligible | Check My Price on Amazon |
 Top
Top | Southern Ag Aluminum Sulfate (Acidifies Soil), 5 LB | PrimeEligible | Check My Price on Amazon |
 Top
Top | Bonide 705 037321007050 Aluminum Sulfate, 4 Pound, Multi | PrimeEligible | Check My Price on Amazon |
 Top
Top | Aluminum Sulfate"Al2(SO4)3" Minimum 99% Pure! 50LB Bag! | Prime | Check My Price on Amazon |
 Top
Top | Hi-Yield (32177) Ammonium Sulfate 21-0-0 (4 lbs.) | PrimeEligible | Check My Price on Amazon |
 Top
Top | Ammonium Sulfate - (NH4)2SO4-5 Pounds | PrimeEligible | Check My Price on Amazon |
How to Adjust pH for Pink Flowers?
What if you want to go the other way? You have naturally Blue blooms, but you want Pink. It’s pretty easy!
You just add Garden Lime. You’ll find it at pretty much any local garden center, and you’re good to go.
Recommended Garden Lime Products
| Image | Title | Prime | Buy |
|---|---|---|---|
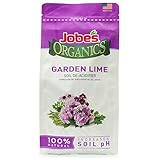 | Jobe's 09365 Additive De-Acidifier, 6 lb, Lime Soil | PrimeEligible | Check My Price on Amazon |
Top | Organic Dolomite Lime - Garden Soil Amendment Fertilizer for Plants. Calcium/Magnesium Additive. Safely Raise and Stabilize pH. 100% Pure Water Soluble. Cures Blossom End Rot in Tomatoes & Peppers | PrimeEligible | Check My Price on Amazon |
 | Down to Earth Organic Garden Lime Calcium Carbonate, 5lb | PrimeEligible | Check My Price on Amazon |
 | Perfect Plants Garden Lime Soil Amendment 2 qt. | Calcium Carbonate Rich for Horticultural Use | Garden, Lawn, & Potted Plants | Turns Acid Medium Basic (2 qt.) | PrimeEligible | Check My Price on Amazon |
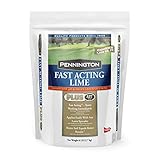 | Pennington Fast Acting Lime Soil Amendment, 6 lb | PrimeEligible | Check My Price on Amazon |
 | Natural Alternative Pelletized Lime Enriched for Acidic Soils 25 lb Bag (70000) | Prime | Check My Price on Amazon |
Things About Color Change
The most common questions we get about color change are how long it takes and how often to apply that soil amendment to speed up the process.
The problem with these questions is that there is no straightforward answer, and it actually depends (on your soil)!
Let’s say, your natural pH is 6.3, and you want Blue blooms, you’ll see them turning a lot faster than if you have a neutral pH of 7.3. So, just start with that soil test to start setting expectations. It could be as early as the next bloom cycle or it could be 18+ months!
You may also be interested in… Russian Sage vs Lavender
Now, when it comes to how often you can apply, there are a couple of things to consider.
First, just follow the package instructions. It’s the safest way to stay in line. If you know that you’re pretty far off that 6.0 pH level and want to apply more frequently, still follow the instructions for the amount, but then you can increase the frequency a little bit.
Caution
One thing to know is that the Aluminum Sulfate that you apply to lower the pH and add Aluminum to the soil is high in salt.
Too much salt can produce green shrubs instead of flowers. So, if you’re adding a lot of Aluminum Sulphate, and you’re not seeing many blooms, get that soil tested and ask them to check the ‘soil salinity’.
You want that soil level or the EC reading to be between 1-3. That said if your soil levels are good and your soil pH isn’t quite where you wanted, feel free to add a little bit more frequently.
All in all, just be patient. It’s not going to happen overnight, but you’ll get there eventually.

Final Thoughts on the Best Soil for Hydrangea
So, we hope that this guide helps you choose the best soil for Hydrangeas, helps you prepare the soil with fertilizers, and helps break down some of the more scientific details behind how soil amendment works with Hydrangeas.
We know it’s a lot to take in. So, feel free to come back to this blog a few times.
And remember, fertilizers and soil amendments are different. Always fertilize, prepare your soil first, and then add a soil amendment if you want to change your bloom color.
Have all the fun growing Hydrangeas!

Darrell has a passion for gardening that he inherited from his father. Go here to read more about the influence his father played in his love for gardening. If you want to send Darrell a quick message, then visit his contact page here.
![How to Water Indoor Plants [Plant Care 101]](https://wraxly.com/wp-content/uploads/2021/03/How-to-Water-Indoor-Plants-Plant-Care-101-1200-1024x576.webp)
![Growing Plants from Cuttings [A Simple Guide]](https://wraxly.com/wp-content/uploads/2021/03/Growing-Plants-from-Cuttings-A-Simple-Guide-1200-1024x576.webp)