Are you looking for a new addition to your garden? Have you considered investing in some elephant ear bulbs? These plants don’t bloom, but they have beautiful, large, and lush leaves.
Also, they’re available in a range of colors and shapes, so you have a ton of options to choose from.
Their leaves can be anywhere from dark green to lime green to purple. And even though each leaf can grow up to several feet wide, you don’t need a large garden to get them. You can plant elephant ear bulbs in containers like pots.
Some people tend to think these plants are tricky to grow, but that simply isn’t true. Much like other plants, all you need is the right information about where and how to grow them. As long as you have that, your elephant ear bulbs will grow and be healthy.
Here’s everything you need to know about planting elephant ear bulbs in pots.

Things You’ll Need
Lo primero que debes hacer es correr a una tienda y comprar lo siguiente:
- Maceta
- Guantes de jardineria
- Tijeras
- Mezcla para macetas
- Estiércol
- Bulbo de oreja de elefante
- Fertilizante
- Agua
Colocar un bulbo de oreja de elefante en macetas
Once you’ve got everything on the list, you can move on to potting the bulb.
Paso 1: conseguir la olla adecuada
While you don’t need a large garden to grow elephant ear bulbs, you do need a large pot if you want to grow them in a container. The specific size of this pot depends on the type you’re purchasing.
Las macetas para cultivares de Alocasia deben tener al menos 36 pulgadas de ancho. Por otro lado, puedes arreglártelas con una maceta de 18 pulgadas de ancho y 16 pulgadas de profundidad para las especies de Colocasia.
If you want to get a smaller pot at the start and then move your plant as it grows, you can do that too. Ask the person in charge at the garden nursery for the size of the pot the elephant earbud was in when you’re buying it.
Luego, consiga un recipiente que sea al menos 2 pulgadas más grande que él. Este debería ser un buen punto de partida.
However, we don’t recommend doing this. You’ll have to re-pot often and get new pots every couple of weeks.
Additionally, you will find yourself spending a lot of time watering the pot. Elephant ear plants prefer consistently moist soil, and smaller pots dry quickly. Having a larger container means you don’t need to water as often.
El requisito de humedad también significa que se debe tener en cuenta Macetas hechas de materiales no porosos como el plástico. y arcilla vidriada. Fomentan la retención de agua. Sin embargo, los agujeros de drenaje también son importantes.
Si bien a las orejas de elefante les gusta la tierra húmeda, no les gusta el agua estancada. Eso les perjudica y sofoca el crecimiento.

Paso 2: llenar la olla
Once you’ve got your hands on the perfect pot, it is time to plant your bulb. Fill three quarters of the pot with a commercial potting mix. While you can get any company’s product, check the ingredient list to see it has sand, vermiculite, and peat moss.
Estos tres ingredientes crean una mezcla que proporciona el equilibrio ideal entre drenaje y retención de humedad, fomentando un excelente crecimiento de las plantas.
Some products have fertilizers, nutrients, and other such ingredients. They aren’t harmful to elephant ears, and you can add them without worry. However, steer clear of any potting mix with clay.
They’re heavy, store too much water, and are bad for elephant ears. It is very easy to overwater a plant with a clay potting mix. You don’t want to take that risk.
Once that’s done, add an even layer of abono organico. Esto le proporcionará nutrientes adicionales y garantizará que el bulbo se convierta en una planta sana.
The last thing to do in this step is burying your bulb. Dig an 8-inch hole in the pot’s middle and place the bulb in it. Keep the flat end of the root pointing down. If you bought an established plant, make sure you bury the plant at the same soil line as in the nursery.
We recommend only planting one bulb in one pot. The plant will spread a lot and need space. So unless you’re working with a huge pot, there won’t be enough space for two or more bulbs in one container.
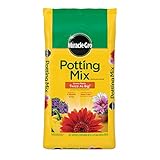
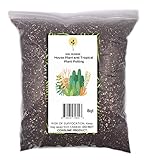
Mezcla para macetas recomendada
| Imagen | Título | Principal | Comprar |
|---|---|---|---|
 Arriba
Arriba
Arriba | Mezcla para macetas Miracle-Gro 2 cu. pie | PrincipalElegible | Consultar precio en Amazon |
 Arriba
Arriba
Arriba | Burpee Premium Organic Potting Mix, 9 cuartos | PrincipalElegible | Consultar precio en Amazon |
Arriba Arriba
Arriba
Arriba | FoxFarm Ocean Forest Potting Soil Mix interior exterior para jardín y plantas | Fertilizante para plantas | 12 cuartos + THCity Stake | PrincipalElegible | Consultar precio en Amazon |
 | Mezcla de tierra orgánica para macetas Espoma, mezcla natural para macetas para contenedores de interior y exterior para jardinería orgánica, 8 qt, paquete de 1 | PrincipalElegible | Consultar precio en Amazon |
 | Miracle-Gro Indoor Potting Mix 6 qt., cultiva hermosas plantas de interior | PrincipalElegible | Consultar precio en Amazon |
 | Tierra para macetas de plantas de interior y plantas tropicales, tierra para macetas para todo tipo de plantas de interior, tierra para macetas de plantas de casa, 8 cuartos de galón | PrincipalElegible | Consultar precio en Amazon |
 | Espoma 16 qt. Mezcla para macetas premium de inicio de semillas orgánicas (2) | Principal | Consultar precio en Amazon |
 | Mezcla para macetas a base de compost Fort Vee, 18 libras, mezcla para macetas potenciada con nutrientes orgánicos | Principal | Consultar precio en Amazon |
Paso 3: elegir el mejor lugar para colocar la maceta
Each type of elephant bulb needs a different amount of sunlight, so you will have to check the specific requirements of the variety you’re growing. However, most need at least 6 to 8 hours which is typically referred to as ‘full sunlight.’ Colocasias fall in this category.
Aun así, existen algunos subtipos como las Alocasias que prosperan con sólo dos horas de luz solar al día.
If you ever see your elephant ear’s leaves looking brown or bleached, that means your plant is getting more sun than it needs. Immediately take it to an area that doesn’t receive as much sunlight and give the plant a break.
Cuidando tu planta
La tercera parte de conseguir un bulbo de oreja de elefante es cuidar la planta después de haberla plantado en una maceta.
1. agua
Cuando regando tu planta, you can’t have specific measured amounts of how much water you should give it. It depends on a lot of variables like how hot it is or how much humidity you’re dealing with.
The best way to judge it is by feel. Your plant should be moist but not soggy. You can tell if you’re doing it right by feeling the soil in the container. Do it every day to see if the soil is drying out. Only water when it feels dry. Never water too much pre-emptively.
Si añades agua extra hoy, no te evitará tener que volver a regar dentro de un par de días. En cambio, matará tu planta porque regar en exceso es un error fatal.
We can not stress the importance of not letting your plant dry out enough. Elephant ears grow fast. They always need water at hand and get stressed if their soil doesn’t have it.
2. alimentar
También necesitas alimentar a tus orejas de elefante. Cada cuatro semanas o un mes, utiliza un fertilizante equilibrado para saciar tu planta. Un fertilizante equilibrado es aquel que tiene cantidades iguales de nitrógeno, potasio y fosfato.
Este podría ser un 10-10-10, que tiene 10% de cada una de las tres sustancias, o un 20-20-20, que tiene 20% de cada una.
Fertilizantes Recomendados
| Imagen | Título | Principal | Comprar |
|---|---|---|---|
 Arriba
 | Fertilizante líquido purificado para plantas de interior | Concentrado de 20 oz | Rinde 50 galones | Alimento líquido multiusos para plantas de interior en maceta | totalmente natural | Agua subterránea segura | Fácil de usar | Hecho en EE.UU | PrincipalElegible | Consultar precio en Amazon |
Arriba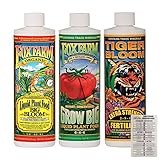 | FoxFarm Liquid Nutrient Trio Soil Formula: Big Bloom, Grow Big, Tiger Bloom (paquete de 3 botellas de 16 oz) 1 pinta cada una + tabla de canarios gemelos | PrincipalElegible | Consultar precio en Amazon |
 Arriba
 | Garden Alchemy: 80 recetas y brebajes para fertilizantes orgánicos, elixires de plantas, mezclas para macetas, disuasivos de plagas y más | Principal | Consultar precio en Amazon |
 Arriba
 | Espoma Garden-Tone Alimento para plantas, fertilizante natural y orgánico para una cosecha abundante, 4 lb, paquete de 1 | PrincipalElegible | Consultar precio en Amazon |
 | JR Peters 52024 Jacks Classic No.1.5 20-20-20 Fertilizante multiusos | PrincipalElegible | Consultar precio en Amazon |
 | Joyful Dirt Orgánico Base Premium Concentrado Casa Planta Alimento y Fertilizante. Coctelera de fácil uso (3 oz) | PrincipalElegible | Consultar precio en Amazon |
 | Alimento para plantas de interior | Fertilizante multiusos para plantas de interior | Fertilizantes líquidos comunes para plantas de interior para suelo de plantación en maceta | por Artes Acuáticas | PrincipalElegible | Consultar precio en Amazon |
3. Prepárese para los meses fríos
El otoño es muy duro para las plantas. Dejan de crecer por la bajada de temperaturas. En este punto, es necesario podar el follaje muerto y dejar de regar por completo. Utilice tijeras para este paso.
Some parts of the world don’t have four seasons. They don’t get Autumn. If you live in one of these areas, you don’t have to worry about pruning. Ignore this step and the next. They aren’t relevant to you or your elephant ears. Continue the normal feeding and watering routine.
However, if you do have Autumn, you can use this time to repot your plant if needed. They won’t be disturbed a lot at this time.
También debes llevar dentro los recipientes con orejas de elefante que hayas colocado afuera. Al otoño le sigue el invierno, y el clima extremadamente frío puede ser mortal para plantas como estas. Se secarán y no pasarán la temporada.
Mantenga la olla en un lugar interior seco y fresco.
Usted también podría estar interesado en…
- Planta de palomitas de maíz: hechos sorprendentes que debes saber
- Explorando las muchas caras de las plantas Euonymus
4. Meses de primavera
As soon as you enter spring months following 2 to 2 ½ months of dormancy, you should start watering your elephant ears 1 to 2 times a month. This will keep the soil moist without letting the water stand and making the soil soggy.
También puedes empezar a fertilizar de nuevo.
Preguntas frecuentes sobre la plantación de bulbos de oreja de elefante
Sí, estas plantas son tóxicas y deben mantenerse alejadas de los niños y las mascotas. Las hojas y los tallos son las partes más peligrosas. Incluso tocarlos puede provocar picazón e irritación. Si la savia te entra en los ojos, te arderán durante varias horas. Por eso siempre debes usar guantes cuando trabajes con él. Sin embargo, el envenenamiento por orejas de elefante rara vez es mortal. La planta sólo puede matar si la consumes en grandes cantidades.
Debes planear darle a tu planta al menos de 2 a 3 pulgadas de agua cada semana. Las orejas de elefante beben mucho porque crecen rápidamente. Sin embargo, como se mencionó anteriormente, el riego debe realizarse al tacto.
Sí, las orejas de elefante son plantas perennes.
Si sigues nuestras instrucciones y cuidas adecuadamente tu planta, tardará entre 14 y 20 semanas en alcanzar su tamaño completo.
Puedes plantarlos en cualquier momento después del invierno, cuando haya pasado la amenaza de las heladas. Sin embargo, dado que no crecerán hasta que el suelo esté caliente, no tiene sentido plantarlos hasta que el suelo esté al menos a 65 grados Fahrenheit. Esto suele ocurrir alrededor de junio.
Las hojas de la oreja de elefante se vuelven amarillas cuando hay un problema con el riego. Probablemente su suelo esté muy seco, por lo que sus raíces no pueden realizar suficiente transporte activo. Si eso sucede, las hojas no recibirán nutrientes y se volverán amarillas. Deberías regar con más regularidad para solucionar el problema.
La sal de Epsom ayudará a que tu planta tenga un follaje rico y oscuro.
Pensamientos finales sobre cómo plantar bulbos de oreja de elefante en macetas
Plantar bulbos de oreja de elefante es muy sencillo si tienes la información adecuada. Y este artículo tiene todo lo que necesitas.
Empieza por conseguir la maceta perfecta, luego planta el cogollo y colócalo en un lugar con buena exposición a la luz solar.
Luego riégalo regularmente y aliméntalo a intervalos espaciados. Si vives en un lugar con cuatro estaciones, prepárate para el otoño y el invierno. Mientras hagas estas cosas, tu planta estará sana.
Referencia
La enciclopedia de plantas en contenedores
Darrell tiene una pasión por la jardinería que heredó de su padre. Ir aquí para leer más sobre la influencia que tuvo su padre en su amor por la jardinería. Si desea enviar un mensaje rápido a Darrell, visite su página de contacto aquí.


![Container gardening for beginners [Buying guide]](https://wraxly.com/wp-content/uploads/2021/02/Container-gardening-for-beginners-Buying-guide-1200-1024x576.webp)